Search This Blog

Friday 10 August 2012

Triumph Tiger 800 with Caribou Panniers

When I bought the V-Strom 650 back in 2008, I bought Hepco and Becker racks and panniers online from Motorcycle Adventure Products and I did a bit of a writeup about fitting them. The racks were great though they took quite a bit of fitting - I really liked the quick release bolts because I could quickly take them off when I didn't need them. The panniers themselves were OK but the locks were very flimsy.
At the time, I looked at the Caribou panniers but the AUD vs USD rate wasn't great so it made them a bit too expensive. Caribou are based in Boulder, Colorado and make panniers out of what seem to be basically video/camera boxes and are pretty much indestructible. The exchange rate has changed for the better and so I ordered Caribou panniers and Hepco and Becker racks for AUD$995 delivered. They took 12 days to arrive.

Caribou panniers fitted to the Tiger.

Racks

For fitting the Hepco and Becker racks, decipher the German/English instructions and its pretty straightforward. Their fitting has changed a lot since the early days with less deconstruction of the bike required. Just lay out all the bits either side of the bike and fit in sequence as per instructions. Some points to note:

1. Take off the pillion seat so you can hold the nuts when removing the frame rail bolts. I found it easiest to use a ring/open spanner (12mm) to hold the nut because it has a flange on it - if you drop it inside the seat/mudguard tail, you may have to dismantle it all in order to get it back so be careful. I reused these flanged nuts rather than the provided nuts because they were easier to hold in the ring spanner - the new nuts have no flange and fall out of the spanner.
Ring spanner inside the pillion seat tail


Flanged nut inside the ring spanner.

2. All the other bits fit really well except the exhaust-side bottom mount - the bracket slides up into the hole under the footpeg but either the bracket is slightly too big or the Triumph piping had some stray weld dots, but the bracket needed a hammer to make it fit.
3. These were all the tools I needed - note that the Triumph nuts are M12 while the Hepco & Becker supplied nyloc nuts are for M12 bolts but have M13 heads.

12 & 13mm ring spanners - also need 4 & 5mm Allen keys

4. Once the quick-release bolts have their washers attached, they don't come off.

Quick-release bolt with lock washer on.

Panniers

Outfitting these with all the bits is straightforward with the assembly instructions supplied.

The plate inside will hopefully not tarnish and stain stuff

The finished product - LHS

The finished product - RHS

The lock and the crossover bar.


Update 11th May, 2013:


  1. The hinge pins holding the lids to the box work loose on long rides - the left hand side one was poking out 10cm before I noticed it and hammered it back in. It has come out again since and the right hand side one has come out as well. I haven't found a solution yet but it is very annoying. See photo below.
  2. The stays which limit the lid opening are useless. The press studs simply come off when you open the lid and one of the bolted ends broke. I have replaced them all with chains now and they work well.
  3. I wish the panniers were wide enough to take a full face helmet.
Broken lid stay.

Fixed lid stay with chain

Hinge pin worked loose after a 400km ride on smooth bitumen


Wednesday 8 August 2012

Fitting the High Windscreen to the Triumph Tiger 800

I am about 180cm tall and found the standard screen on the Tiger just directed the airflow straight into my chin. So I ordered the Triumph genuine High Screen from Peter Stevens Motorcycles (http://www.peterstevens.com.au/) in Melbourne for AUD$216.01 and it was on my doorstep in 2 days.
Original screen

High screen fitted

Preparation

1. The only thing with Peter Stevens is that they don't provide any fitting instructions with any of their stuff so you have to download your own from http://www.triumphinstructions.com/default.aspx.
To download the instructions on this site, you must have the Triumph part number. The part number on each of the parts supplied with the screen are all different and none are recognised by the "instructions" website. After more searching on the web, I found one that worked - the part number is "A9708248". This allows you to download the PDF of instructions but you can get them here to save you the trouble I had.

2. The instructions are really good and easy to follow so I'll just add a few bits that I learnt and give you the photos I took.

3. Tools needed:
  • 1 x 5mm Allen key
  • 1 x 8mm ring/open end spanner
  • 1 x T30 Torx key

4. Time - takes about 30 minutes at a leisurely pace to take photos along the way.

Installation

I just laid out all the parts as on page 1 of the instructions and took it step by step. The only minor differences I found were:

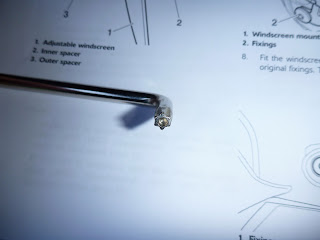
1. You need a T30 Torx key to undo the lower bolt for the brackets - "why?" you might ask. This isn't mentioned in the instructions. All the other bolts are Allen key bolts.

2. Steps 13, 14, and 15 can be ignored. The dome nut that is supplied does not cover all the threads of the adjuster bolt so I didn't use it. I just used a 10mm nut on each side that I had at home.

3. I adjusted the screen to the highest setting and it seems to be significantly higher than the original. I'll let you know how it goes. I'd really like it to tip the wind over my head.


Photos below:

All the parts laid out
New larger screen compared to original screen

The T30 Torx screw on the windscreen bracket

This a T30 Torx key in case you don't have one.

Finished setup on the RHS

Saturday 14 July 2012

Fitting Barkbusters to the Triumph Tiger 800

I had at first spent $127 on genuine Triumph handguards for the Tiger which fitted very easily but I found them to be way too small to offer any protection from either wind or rain. They were also very flimsy and rotated on the handlebar end whenever bumped. A waste of money and I don't recommend them at all.
I bit the bullet and bought Barkbusters from Western Motorcycles at Penrith - they don't stock Triumph gear but only took a couple of days to get them in. $166.98 including the Storm S3 shields and the BHG47-NP bars.

See on the website at: http://www.barkbusters.net/products/194.html

Preparation:

Fitting was not quite as easy as the Barkbuster website would have you believe though a satisfactory result can be achieved with a bit of adjustment and that's the subject of this post. Make sure the handlebars and the levers are set to what's comfortable for you before you start. When I picked up the bike, the wires and cables which exit under the handlebar from both handgrips would hit the plastic side cowling of the tank and further limit the already not overly generous steering lock from standard. I rotated and refitted the handlebar risers as per the handbook which slightly lifted the bars. I then rotated the handlebars in the clamps so as to accurately match the cross mark on the bars to the joint space of the switch blocks. This put the bars in the right spot for me and stopped the wires/cables from limiting the steering lock anymore - it also helps to swap the flimsy standard rubber cable tie for a proper one.

Tools:

1 x 4mm Allen key - for handlebar end bolts
1 x 5mm Allen key - for handlebar clamp bolts
1 x 10mm socket or ring spanner - for handlebar clamps
1 x Phillips head driver - for self-tappers into the plastics.


Barkbuster fitting:

1. Undo the packaging and read the instructions to get a feel for all the nuts, bolts and widgets that come with it. The guards fit both the Tiger 800CA and 800XC as well as the Enduro 1200 though the 1200 has some slightly different bits included - I used some of the 1200 bits because they fitted the bike better and I'll explain this as we go.
2. I fitted the plastic shields to the aluminium bars first - one self-tapping screw in the front and 2 longer screws into the plastic bracket as shown below.


Left hand side handlebar end showing the plastic cover screws installed and the use of the 1200 spacer.
3. Remove the left handlebar end cover and discard the cover and screw. I used the black spacer and the longer bolt from the 1200 bits to position the aluminium bar a bit further out from the handlebar because the clutch lever end was too close to the aluminium bar - see above. I could have moved the clutch lever further in-board along the bar but that bends the clutch cable a bit too much because its got to clear the Barkbuster bracket.

Left hand side handlebar bracket assembled.
4. Loosely assemble the left hand side handlebar bracket with the ring marks on the inside of the bracket closest to the centre of the bike. The cylindrical bit that bolts to the aluminium bar is positioned between the clutch cable and the wiring harness.

Full lock test for the left side guard.
5. Turn the steering to full lock to the right and check that the plastic cover doesn't hit the screen and that the clamp end of the aluminium bar doesn't hit the speedo. Also check that the clutch cable is not bent or impeded by the clamp. Then tighten everything up doing up the rear bolt of the handlebar clamp last. Check again as above that things still don't hit anything.

RHS handlebar end showing small spacer used.
6. Same assembly for the right hand side except I used the smaller spacer and bolt this time (this is actually the one recommended for the Tiger 800). If you use the 1200 Enduro spacer, the cylindrical bit on the aluminium bar clamp hits the the metal part of the hydraulic cable for the front brakes. See below.

RHS handlebar clamp
7. I positioned the cylindrical bit between the hydraulic cable and the wiring harness/cables in order to get the height right of the aluminium bar. I didn't want to shift the hydraulic cable up or down. Check that it clears the clamp so it doesn't rub. Loosely assemble as before and test steering lock clearance against the screen and the speedo. Its a lot closer on this side but still doesn't hit - its better if you use the 1200 bar end spacer but I wasn't happy about the aluminium bar hitting the hydraulic cable.

Steering lock test on the RHS.
8. Tighten everything up once you've got it right.

A rider's view of the handlebar clamps.
9. On the extreme right of the photo above you can see a cable tie - I found the cylindrical bit pushed the wiring harness/cables down enough to make them hit the tank plastic shroud once everything else was just right. So I loosely cable-tied the throttle cables to the wiring harness and then cable-tied that cable tie to the handlebar to lift it all up off the plastic shroud. Then checked steering lock again and it was much better.

Great bike! Made a sheepskin seat for it as well (in two parts to match the two-part seat)


Thursday 5 July 2012

Biking at Louee again


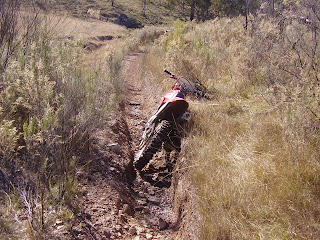
I've mentioned Louee before and I haven't been for nearly 3 years but went again just recently - it is as great as ever and the CRF230 and I had a ball. $45 a day and 150km of trails and motocross tracks. I sound like an advert for them but it is such a good experience.
See their website at: http://www.louee.net.au